rv:build:steps
This is an old revision of the document!
Table of Contents
Build order
downsizing
Getting rid of excess material goods takes a long time, and can can be emotionally/psychologically harder than one might think.
Some ideas to help with the downsizing:
- stop buying physical stuff that will not go in the van with you. Bias purchases toward experiences, digital goods, consumables
- clear out room by room in your house or apartment. As soon as there is one empty room, measure out a spot on the floor that approximates the living space of the smallest van you are considering. A corner may work best, so you can also mark the interior height on two walls. Blue painter's tape will remove easily and without damage when you move into your van.
- make spaces for stuff you want to sell, and stuff you want to give away. Put the give-away somewhere near the door so you will remember to offer those items to friends and family who visit.
- start paring your wardrobe down to the essentials: “Pack as if you're going out for only a week during the summer. Then add what you'd need if you were going out for only a week in winter. That should pretty much cover everything.” – MrNoodly1)
- let your family and friends know you can't use physical gifts (unless it's an item or material you can use in your build)
- convert your book collection to an e-reader like a Nook or Kindle. Note that the Kindle app can be installed on tablets. If you have books that are not available in digital format companies like 1dollarscan can digitize your physical copy.
thinking
- get ideas from forums, instagram, youtube, etc
- consider what kind of amenities you want
- bed: material, across the van or lengthwise, dedicated or used for other purposes, mattress ventilation
- storage: plastic bins, milk crates, thrift store dressers, built cabinets
- water tanks
- fresh
- pump: manual, electric
- gray
- cooking
- toilet and hygiene
- power: shore, solar, house battery
- roof real estate: solar panels, fan
- sketch ideas for layout on paper or software
mocking up
- sit in the space, or measure the space and mark it out in an unused room
- use actual gear or cardboard mockups as placeholders to help you understand the layout
roof
this is done early so metal debris can be swept/vacuumed out easily
- fan - cut hole, install, leave wiring accessable
- solar
- install rack or tabs
- install panels
- install wiring entry point
- insulate ceiling
floor
- cut any needed holes for vents, drains, etc
- body modification - cut any holes for water entry, shore power connectors, etc. Note: traditionally hookups go on the driver's side of the camper.
acoustic dampening
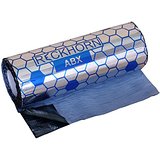
- if desired, add acoustic dampening material like Reckhorn ABX.2)
framing
Framing is done before wiring to avoid damaging wiring.
- if you 
wiring
insulating
shakedown, iteration
- overnights
- weekends
- trips
Ideas taken from
rv/build/steps.1553691412.txt.gz · Last modified: 2020/10/11 23:48 (external edit)


